Welcome to Onlinetunes24 .....

We are committed to become your long-term, trusted partner. Our priority is not only to provide professional services and solutions but to become your IT vendor dedicated to meet your needs today and support your growing business needs tomorrow.

This is default featured post 1 title

We are committed to become your long-term, trusted partner. Our priority is not only to provide professional services and solutions but to become your IT vendor dedicated to meet your needs today and support your growing business needs tomorrow.

This is default featured post 2 title

We are committed to become your long-term, trusted partner. Our priority is not only to provide professional services and solutions but to become your IT vendor dedicated to meet your needs today and support your growing business needs tomorrow.

This is default featured post 3 title

We are committed to become your long-term, trusted partner. Our priority is not only to provide professional services and solutions but to become your IT vendor dedicated to meet your needs today and support your growing business needs tomorrow.

This is default featured post 4 title

We are committed to become your long-term, trusted partner. Our priority is not only to provide professional services and solutions but to become your IT vendor dedicated to meet your needs today and support your growing business needs tomorrow.

Showing posts with label জুমলা (Joomla). Show all posts

Resetting a user password

Resetting a user password can be done a number of ways:

Front-end

The user can do it by themselves through the front end of your site:
  1. Make sure the Login Module is published and active on the front end of your site. If not, log in to the Administrator back-end and go to the Module Manager to enable it.
  2. Find the Login Form on the front-end of your site. If you need to reset your password, click "Forgot your Password?" and you will be prompted to enter your email address. A confirmation code will be emailed to you so you can enter a new password.
  3. If you can't remember your username, click "Forgot your username?" and it will be emailed to you.

Back-end

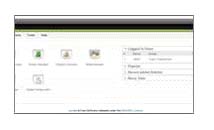
The site administrator can perform the following steps:
  1. Log into the Administrator back-end of your site (e.g. www.yoursite.com/administrator)
  2. Choose Site from the top menu, then User Manager.
  3. Click the User's name you want to edit.
  4. Enter the new password into the New Password field and type it again in the Verify Password field.
  5. Click Save.

Resetting in PhpMyAdmin

If you have lost your admin password and you can't log into the backend, then you're able to reset the password in your PhpMyAdmin. Complete the following steps:
  1. Select your database in PhpMyADmin
  2. Select the jos_user table
  3. Click "Browse" and select "Edit" (the small pen on the user whose password you wish to reset
  4. You will now see all user data in a form. Under the "password" field, you will see a long list of encrypted letters. Delete these letters, and type in a new password
  5. BEFORE saving, remember to select "MD5" in the "function" dropdown list.
  6. Save your new password and log into the backend of your Joomla site. Remember to reset the password again from the back-end, as the MD5 encryption is much more secure this way.

Add article title to read more link

কিভাবে Read more... আর্টিকেল টাইটেল যোগ করবেন ?

যদি আপনার টেমপ্লেট এ Read more... অপশন না থাকে তাহলে 'html' নামে একটা ফোল্ডার তৈরী করেন। তারপর নিচের ধাপগুলো অনুস্বরণ করুন।

Then locate the following files
  • (joomla)/components/com_content/views/category/tmpl/blog_item.php
  • (joomla)/components/com_content/views/frontpage/tmpl/default_item.php
  • (joomla)/components/com_content/views/section/tmpl/blog_item.php

Copy the files to your template's html folders
  • (yourtemplate)/html/com_content/category/blog_item.php
  • (yourtemplate)/html/com_content/frontpage/default_item.php
  • (yourtemplate)/html/com_content/section/blog_item.php

Open these files.
Nearly at the bottom of these files you should be seeing something like:
<a href="<?php echo $this->item->readmore_link; ?>" class="readon<?php echo $this->item->params->get('pageclass_sfx'); ?>">
     <?php if ($this->item->readmore_register) :
          echo JText::_('Register to read more...');
     elseif ($readmore = $this->item->params->get('readmore')) :
          echo $readmore;
     else :
          echo JText::sprintf('Read more...');
     endif; ?></a>
Change the line
echo JText::sprintf('Read more...');
into
echo JText::sprintf('Read more', $this->item->title);
The “Read more” link should now look like this: Read more: (Article title)

Removing author name, creation date or update date from an article

To remove the author name, creation date and time and modified date and time from an Article:
  1. Open the Article for editing either by:
    • Click the Content > Article Manager menu item or click the Article Manager button in the Control Panel.
    • Once in the Article Manager, click the Article Title to edit or tick the box next to the Article and click the Edit button in the toolbar.
    • If you are logged in to the Front-end with appropriate permissions and are viewing the Article you wish to edit, click the Edit icon usually found at the upper right corner.
  2. Click on the Parameters - Advanced pane in the Parameters section of the Edit Article screen.
  3. Locate the Author Name, Created Date and Time and Modified Date and Time drop down fields in the Parameters list and change to Hide as required.
    • Use Global: Uses the setting in the Article Parameter Global configuration.
    • Hide: Hides the information and overwrites the global configuration for the current Article only.
    • Show: Displays the information and overwrites the global configuration for the current Article only.
  4. Click the Save or Apply button in the toolbar to save the Article.

জুমলা ইনস্টল করা

আমরা অনেকেই জুমলার নাম শুনেছি। আজ আমরা জুমলা কিভাবে ইন্সটল করতে হয় তা শিখব। আমি প্রথমে ক্মা চেয়ে নিচছি এই কারণে যে আমি ধারাবাহিকভাবে কোন টিউটরিয়াল লিখতে পারবনা। আমার পোস্টগুলো র‍্যান্ডমলি হবে চেষ্টা করব সব কিছুর ব্যাপারে ধারনা দিতে আর আমার এই পোস্ট কোন এক্সপ্রা্ট ভাইদের জন্য নয়। কারণ তারা আমার চেয়ে অনেক বেশি ভাল জানেন। আমার এই পোস্টে যদি নতুনদের সামান্য পরিমান ও উপকার হয় তাহলেই আমার লেখা স্বারথক হবে।
 
১. যদি localhost বা নিজস্ব PC-কে সার্ভার হিসেবে ব্যবহার করেন, তাহলে www/htdocs ফোল্ডারে ফাইলটি আনজিপ বা এক্সট্রাক্ট করতে হবে। আপনি যদি একই সার্ভারে একাধিক ওয়েব সাইট বানাতে চান, তাহলে www-এর ভেতর একাধিক ফোল্ডার করে নেওয়া ভালো। সেক্ষেত্রে প্রতিটি ফোল্ডারে আলাদা করে জুমলা ইনস্টল করতে হবে। শুধু তাই নয়, এই পদ্ধতি ভিন্ন ভিন্ন ফোল্ডার করে আপনি ওয়ার্ডপ্রেস বা ড্রুপালও ইনস্টল করতে পারবেন। ধরে নিলাম, আপনার কাজের জন্য www-এর ভেতরে joomla নামে একটি ফোল্ডার বানিয়েছেন। তাহলে সেই ফোল্ডারের ভিতর ফাইলটি আনজিপ বা এক্সট্রাক্ট করুন। আনজিপ করার পর অনেকগুলো ফাইল দেখা যাবে।
আপনি যদি সরাসরি ওয়েব সার্ভারে ইনস্টল করতে চান, তাহলে আপনার ওয়েব সাইটের public_html বা  public_www ফোল্ডারে জুমলা ফাইলটি আপলোড করে সেখানেই এক্সট্রাক্ট করুন।
২. এইবার ফায়ারফক্স ওপেন করে http://localhost/joomla লিখে এন্টার দিন। ওয়েব সার্ভারের ক্ষেত্রে www.yoursite.com লিখলেই চলবে। নিচের পেজটি আসবে।
৩. এখানে আপনাকে আসলে ভাষা নির্বাচন করতে বলবে। বেশ কয়েকটি ভাষায় জুমলা পাওয়া যায়। ধরি, আপনি ইংরেজি ভাষা নির্বাচন করতে চাচ্ছেন। তাহলে Next-এ ক্লিক করুন। Pre-installation Check নামে একটি অপশন আসবে।
৪. এখানে দুটি ঘরে বিভিন্ন কনফিগারেশনের জন্য Yes বা No অপশন দেখা যাবে। সব কনফিগার ঠিকঠাকমতো করা থাকলে কোথাও No দেখার কথা না। তারপরও অনেকে বিশেষ করে যারা সার্ভারে প্রথমবারের মতো ইনস্টল করছেন, তারা প্রথম ঘরের শেষ অপশন অর্থা configuration.php writable-এর জায়গায় No দেখতে পারেন। উদ্বিগ্ন হওয়ার কোনো কারণ নেই। দ্বিতীয় ঘরে কোথাও No দেখা গেলেও চিন্তার কোনো কারণ নেই। Next বাটন চাপুন।

৫. লাইসেন্স অ্যাগ্রিমেন্টটি পড়ে একমত হলে আবার Next চাপুন।

৬. এখন Basic Settings-এ কিছু কাজ করতে হবে।
Database Type-এর জায়গায় mysql থাকবে।
HostName-এর জায়গায় localhost লিখুন। যদি আপনার ওয়েব সার্ভার আপনাকে অন্য কোনো নাম দেয়, তাহলে সেটি বসাতে হবে। এখানে সাধারণত localhost-ই হওয়ার কথা।
User Name-এর জায়গায় root লিখুন। তবে যারা নিজস্ব সার্ভারে ব্যবহার করবেন তাদের একটা নিজস্ব নাম থাকবে। ধরি, সেটি yourname তাহলে সেখানে yourname লিখুন।
mysql কনফিগার করার সময় যে পাসওয়ার্ডটি দিয়েছিলেন, সেটি এখানে বসান।
আপনার পিসিতে আগেই joomlatest নামে একটি ডেটাবেইজ তৈরি করেছেন। তাই এখানে 
joomlatest লিখুন। নিজস্ব ওয়েব সার্ভারের জন্য yourname_joomlatest ডেটাবেইজ তৈরি করেছিলেন। তাই এখানে  yourname_joomlatest লিখুন। আর কিছু করতে হবে না। Next চাপুন। নিচের চিত্রের মতো দেখা যাবে।

৭. এফটিপি কনফিগারেশন চাইলে এখন করতে পারেন। না হলে এটা পরেও করা যাবে। আমি সবসময় পরে করি। কনফিগার করে কিংবা এখন করতে না চাইলে Next চাপুন।

৮. এখানে প্রথমে আপনার সাইটের নাম দিতে হবে। তারপর আপনার ইমেইল ও পাসওয়ার্ডগুলো সংশ্লিষ্ট বক্সে বসাতে হবে। স্যাম্পল ডেটা ইনস্টল করতে চাইলে Install Sample Data-তে ক্লিক করুন। যারা প্রথমবারের মতো জুমলা ব্যবহার করছেন, তাদেরকে আমি এই Sample Data ইনস্টল করতেই বলবো। তাহলে জুমলা সাইট সম্পর্কে একটা প্রাথমিক ধারণা পাওয়া যাবে। তারপর Next-এ চাপুন।

৯. কাজ মোটামুটি শেষ। এই পর্যায়ে নিচের প্রথম ছবিটির মতো দেখা যাবে যেখানে জুমলার Installation ফোল্ডারটি মোছার একটি বার্তা আসবে। যেখানে জুমলার ফাইল আনজিপ বা এক্সট্রাক্ট করেছিলেন, সেখানে গিয়ে Installation ফোল্ডারটি মুছে দিন। সাবধান, এই ধাপটি উপেক্ষা করা যাবে না। সাইটের নিরাপত্তার জন্য এই ফোল্ডারটি ডিলিট করতেই হবে।


১০. Installation ফোল্ডারটি মুছার পর Admin-এ ক্লিক করুন। এখানে নাম Admin লিখে পাসওয়ার্ড দিন এবং এন্টার দিন। ব্যাস আপনার জুমলা সেটাপের কাজ শেষ।

১১. অ্যাডমিনের পাসওয়ার্ড দেওয়ার পর জুমলার মূল কন্ট্রোল প্যানেল দেখাবে। সেটি দেখতে এরকম।


Loading
Twitter Delicious Facebook Digg Stumbleupon Favorites More

 
Flying Twitter Bird Widget By ICT Sparkle